
The Definitive Guide to Locking Down an iPhone (iOS 16)
A step-by-step guide to completely locking down an iPhone or iPad for iOS 16, for parents who are serious about protecting their kids from the dangers of unrestricted online activity.
- Platforms
- iOSiPadOS
With a little hard work, it's possible to entirely lock down an iPhone or iPad so that it is extremely safe for your child to use. Thanks to Apple, parents have all the tools they need to control access, apps, and internet content. The bad news is that these controls are scattered over an unintuitive hodge-podge of settings screens, and there are several important loopholes that are easy to miss. This tutorial will walk you step-by-step through the entire process.
What do you mean by safe?
Many parents naively think that the primary danger posed by internet-connected devices is that they could allow predators to gain access to your child. While this is a legitimate danger and a horrific tragedy whenever it occurs, it is nevertheless relatively rare and often distracts parents from dealing with the dangers which almost certainly will affect their kids.

What is sadly unbelievably common is for adolescents of both sexes—because of their own innate curiousity, surging hormones, and lack of impulse control—to develop lifelong addictions to pornography or to be deeply scarred by engaging with other types of socially and emotionally damaging content and behavior on the internet.
You wouldn't fill your child's closet with hard-core adult magazines and hope they would have enough self-control to never look inside. Giving your child a phone that is not thoroughly locked down is exactly the same.
As unpleasant as it might be, it's worth familiarizing yourself with some of the heart-breaking statistics, like:
- 90% of children ages 8-16 have seen online pornography
- 70% of children ages 7-18 have accidentally encountered porn searching the web while doing homework
- the largest group of internet porn consumers is children ages 12-17
- 22% of teenage girls say they have posted nude or semi-nude photos of themselves online
- 10% of all material on the internet is porn
The Safest Phone is No Phone
Before you get to work locking down your child's iPhone with this tutorial, I'd be remiss if I didn't advocate for what I think is the simplest and most effective way to protect your child, and that is—don't give them a phone. It's become incredibly common for almost all kids to have phones, but it truly doesn't have to be that way. I would highly advise you to hold out as long as you possibly can before giving your kids a phone. And if you already have given them one, think hard about taking it back.
I am the father of four children (currently 18, 17, 14, and 10), and only my oldest two kids have phones. My oldest only got his phone a few weeks after his 16th birthday, and my second at a similar age. Many generations of kids have survived their pre-teen and adolescent years without a phone, and yours can too. I realize it's going against an extremely strong societal norm, but absolutely nothing beats the simplicity and safety of them simply not having a phone. And there's a growing amount of research showing that you might be greatly helping their cognitive and emotional development.
Start by deleting apps
The iPhone comes with many built-in apps, and before you started working to lock down your child's phone, you or they may have installed more. Therefore, the first thing you should do is delete every single app that they don't need or you haven't thoroughly checked for safety. A child's phone is a tool, not an entertainment device. It should definitely not allow them to surf the web, play non-educational games, search for and install apps, or access music, videos, or social media content from the internet.
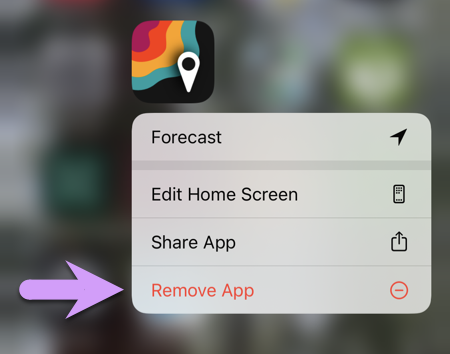
To delete an app, tap and hold its icon, until you see the option to remove it:
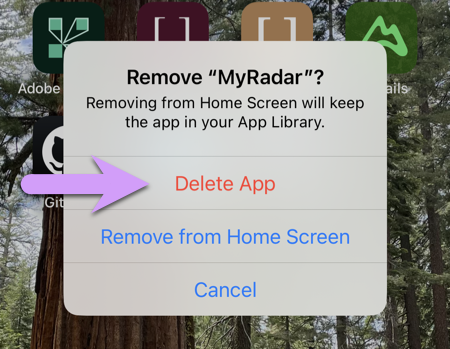
Then tap to delete the app:
Disable Siri Integrations
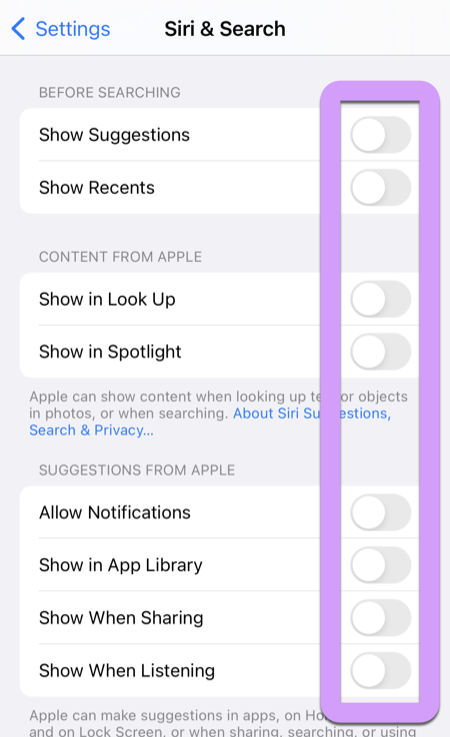
The next thing you need to do is take a moment to disable some Siri integration settings. It's important to do this before disabling Siri entirely via Screen Time (explained below) because once Siri is disabled, these options are no longer visible, but are still in effect.
Start by going to the main Settings App.
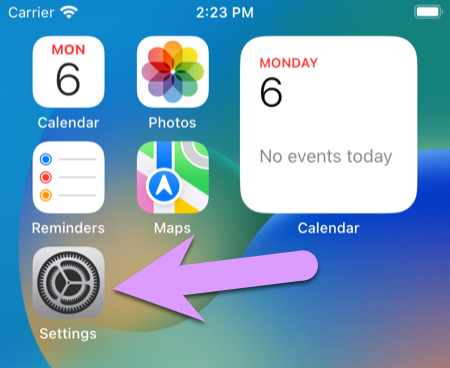
Scroll down, and tap Siri & Search.
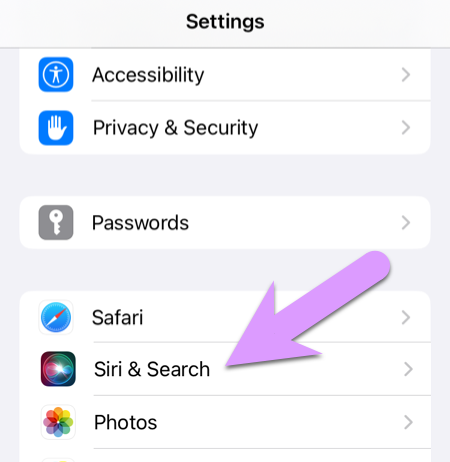
Then disable all the settings shown below:
Getting Started with Screen Time
Now that we've got apps deleted and Siri integrations turned off, we'll turn our attention to Screen Time, which is the main tool Apple gives you to lock down an iOS device. You may already be familiar with Screen Time, because many adults use it to track how much time they spend on their phones, which is one of its primary purposes. But it also has some really powerful features to completely control what your kid has access to.
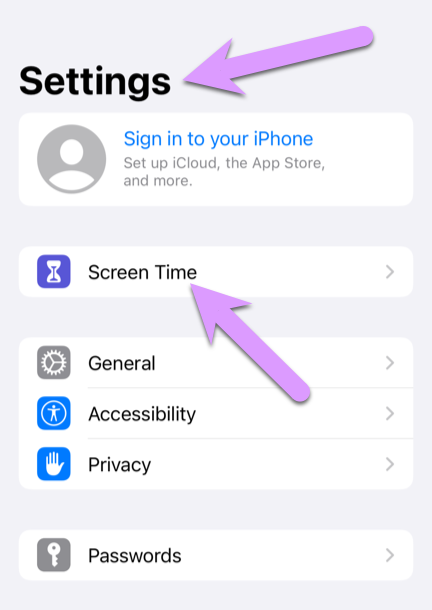
To get started, go to Settings → Screen Time, as shown below:
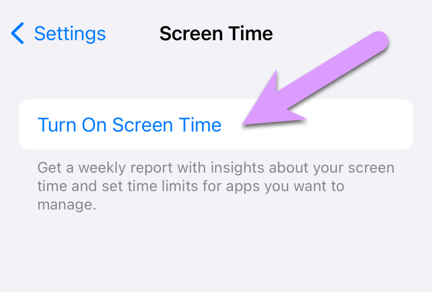
Then, click to turn on Screen Time:
"My iPhone" or "My Child's"
The next prompt will ask you if the phone is "My iPhone", or "My Child's".
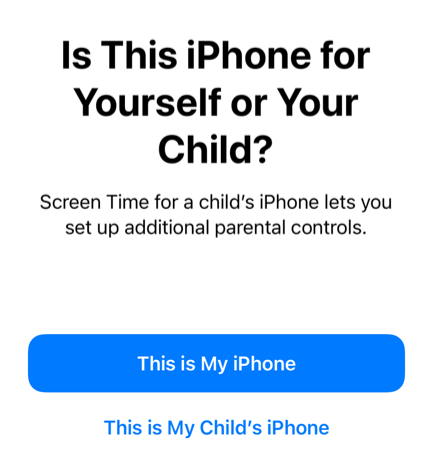
You can select either option, however, if you choose "My Child's", you'll need to have Family Sharing already set up. You can pause at this point and set up Family Sharing if you want, by following the instructions here. The benefit of setting up Family Sharing and choosing "My Child's" is that you'll be able to control their settings and view reports of activity from your own device. The only real downsides are the time it takes to do the initial setup of Family Sharing, and a restriction that once your kids turn 18, they will be able to disable these restrictions themselves. On the other hand, if you choose "This is My iPhone" you'll still be able to protect the device to the same degree, you'll just have to make any changes from your child's device rather than from your own. If you're not sure what to do, I recommend choosing My iPhone, only because it's a little simpler to get started.
At this point, the instructions for continuing briefly diverge, depending on what choice you made between "My iPhone" or "My Child's".
Setup wizard steps for Family Sharing
If you chose "My Child's iPhone", you'll be presented with several screens guiding you through some setup steps. Skip past all three screens shown below.
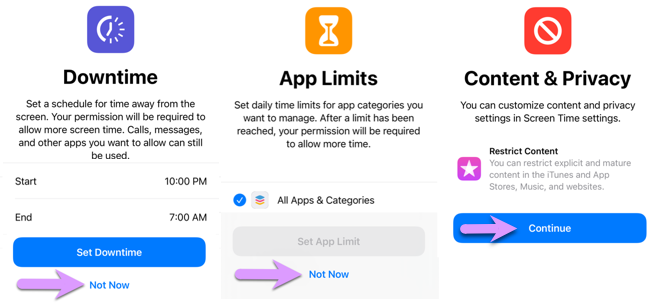
When it prompts you to enter your Apple ID, click cancel.
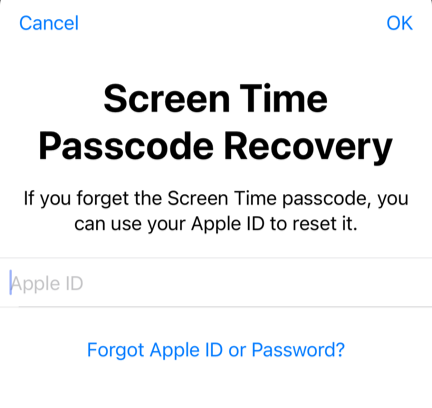
Setting a passcode
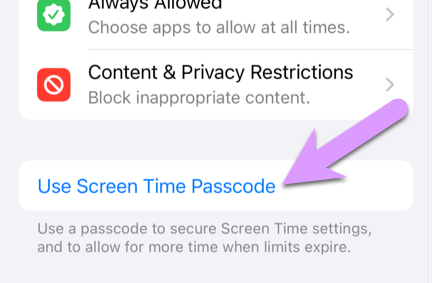
At this point, if you are setting up your child's iPhone without Family Sharing you'll need to click the button labeled Use Screen Time passcode, shown below. Otherwise, you should already be seeing the screen prompting you to set a passcode.
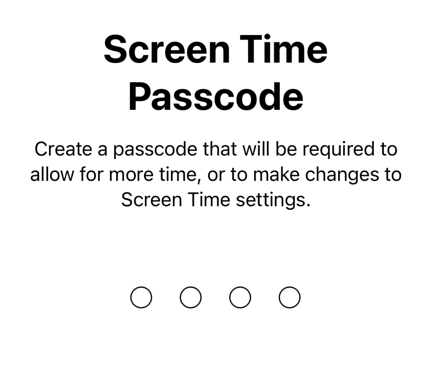
Which will bring up this screen (if it's not already up), where you should enter and confirm a 4 digit passcode:
Downtime
The Screen Time controls have five main sections. We'll work through them one by one, starting with Downtime, although we'll have the most to say about the fifth area, which is the most important.
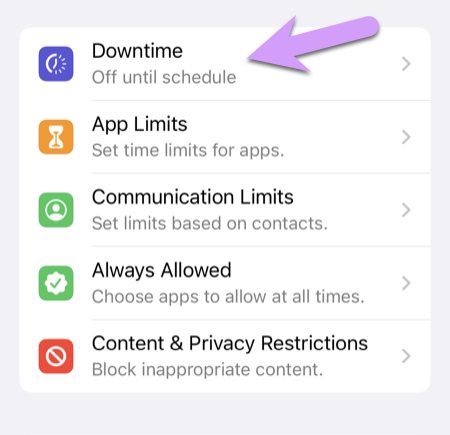
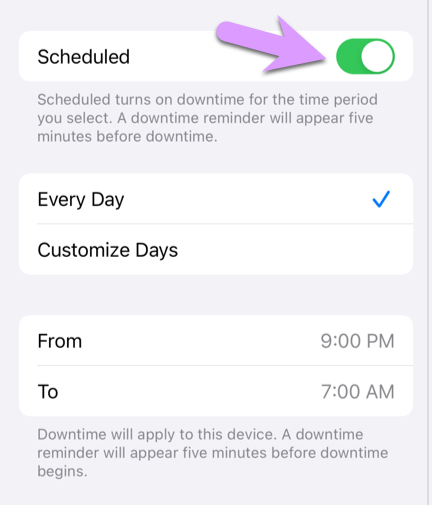
Downtime allows you to enforce a scheduled period when your child has no access (or limited access) to their device. While not strictly necessary to keep your kids safe, enabling Downtime is almost always a good idea. Kids (especially teenagers) are often awake for hours in the early part of the night, and if they have access to their phones and are bored, bad things frequently happen. Restricting their device usage at night also helps encourage good sleep habits.
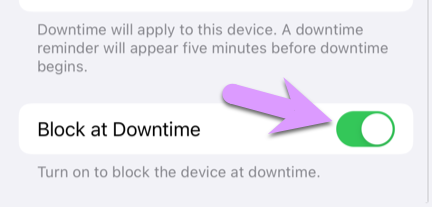
Tap to enable a scheduled downtime, and set the schedule for a time that seems appropriate for your child.
App Limits
The next section on the main screen is for App Limits.
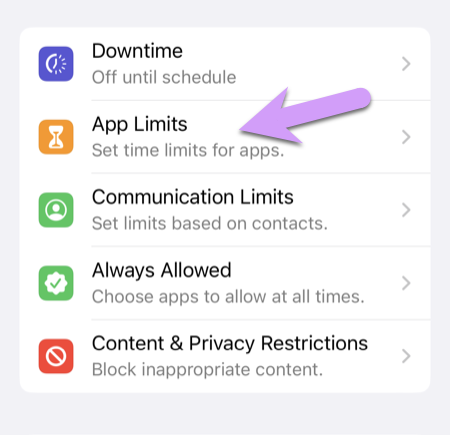
This tutorial won't cover App Limits in depth, because they're not central to protecting your kids. Every app that could be dangerous should be completely blocked by techniques shown later in this tutorial. If you have some apps that you only want grant limited time for each day, then App Limits can be a useful tool for that end.
In my opinion, web-browsing (Safari) and all social media apps should be entirely eliminated from your child's iPhone, not regulated with time limits. Phones should provide only tools for communication (email, phone, and texting), plus required safe apps for school and work, as needed. Web browsing should only be done on a computer, ideally in a public place, with a tool like Gertrude to restrict access and provide supervision.
Communication Limits
The next section on the main screen is for Communication Limits.
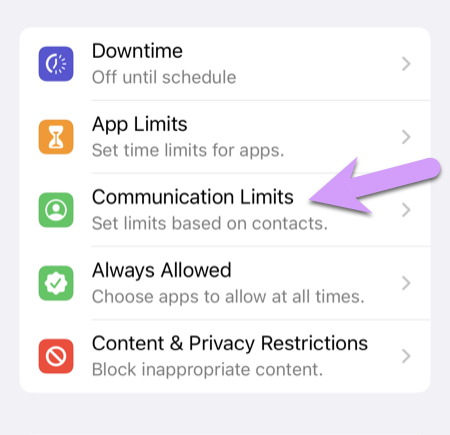
The Communication Limits settings area (shown below) allows you to control who your child can communicate with.
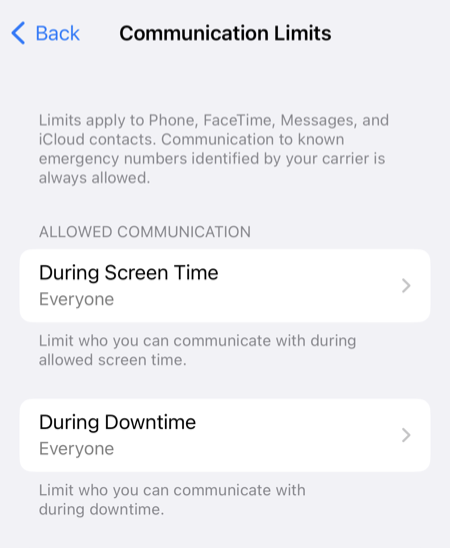
Depending on your particular situation, it might be wise and appropriate to limit communication to specifically approved contacts, or prohibit communication during Downtime. But as this area is not usually critical for safety and is highly dependent on your child and unique context, we won't try to give any guidelines in this tutorial.
Always Allowed
The next section on the main screen is for Always Allowed.
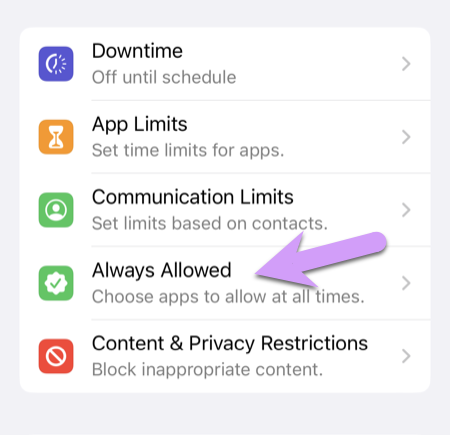
This section is a bit confusing. In my opinion it should be a screen within the Downtime settings area. Its only normal purpose is to bypass Downtime restrictions in certain ways.
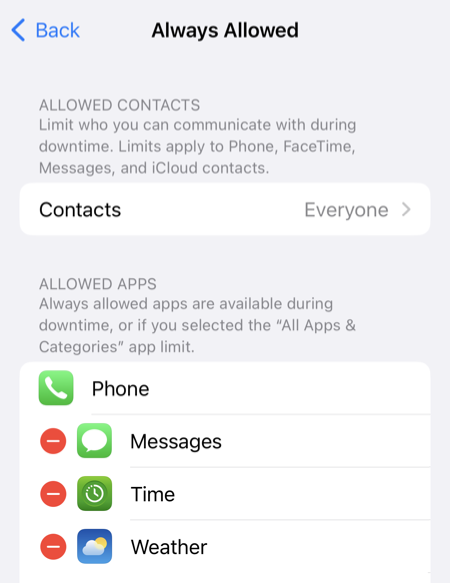
A good example of a good Allowed App would be the Clock app, if you wanted your child to be able to use their iPhone as an alarm clock, and have access to set it after their Downtime schedule kicks in.
You can also add exemptions for certain contacts that can always be contacted, no matter what time it is. Used sparingly, these controls can provide a nice layer of needed customization on top of the Downtime restrictions.
Content & Privacy Restrictions
If your goal is to completely lock down your child's iPhone, making it a truly safe device, most of the controls you're going to need to set are in the fifth and final section, labeled Content & Privacy Restrictions:
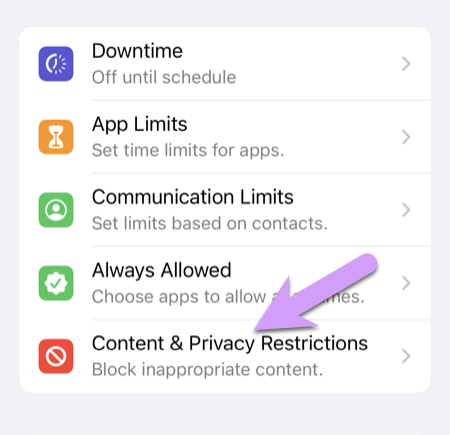
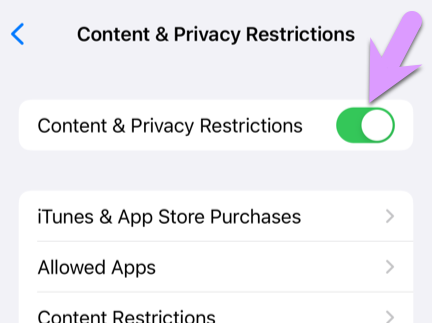
Start by tapping to enable restrictions:
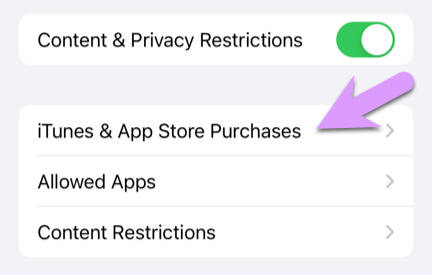
iTunes & App Store Purchases
Then tap the section labeled iTunes & App Store Purchases, shown below:
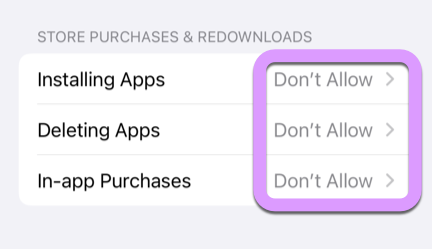
For a safe iPhone, all three of these options should be set to Don't allow.
Allowed Apps
Next, tap the back button to get back to the Content & Privacy Restrictions screen, and then tap to select the second section, labeled Allowed Apps:
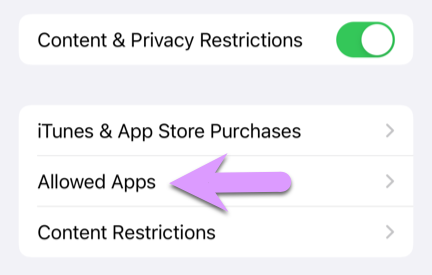
This is another section that is a bit confusing at the outset, because there is another screen at the main level called Always Allowed that looks very similar. That screen let you exempt certain apps from Downtime. This screen lets you enable/disable apps entirely, irrespective of Downtime.
This is an extremely important area because it's the only way you can disable/remove certain apps, like Safari—the built-in app for surfing the web which is the single most dangerous app on your child's iPhone.
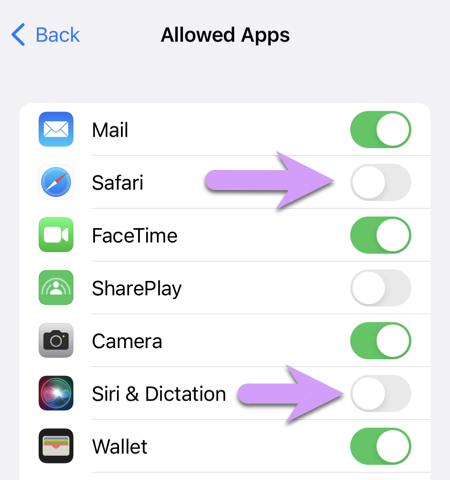
Work through the list of apps, leaving enabled only the apps that are truly necessary, and you're sure are safe. We encourage you to take a very conservative approach: kids' phones should be very minimal. The more apps you allow, the more chance you've accidentally opened up something that could allow them unrestricted access to the internet.
Content Restrictions
Next, tap the back button to get back to the Content & Privacy Restrictions screen, and then tap to move into the third section, labeled Content Restrictions:
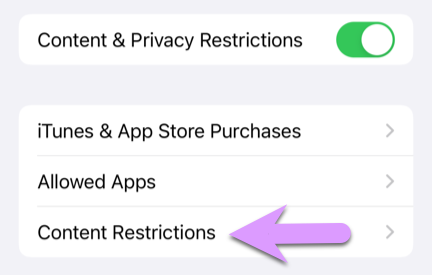
Which brings you to this screen:
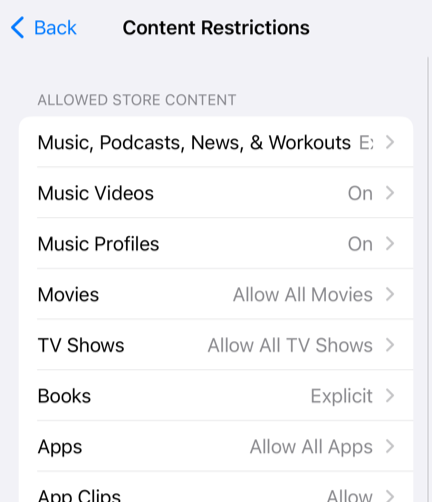
There's a lot to take in on this screen. Loads of different settings. Go through each setting one by one, turning it to the safest (or most disabled) option, unless you have a good reason to do otherwise. For example, anywhere it offers you the options of "Clean" or "Explicit", choose "Clean", if it offers "Off" and "On" choose "Off", and if it offers "Don't Allow" or "Allow" choose "Don't Allow".
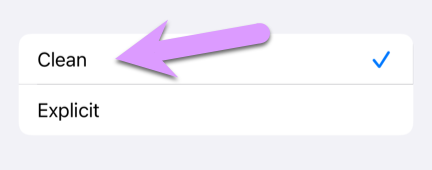
Three of the sub-sections deserve particular attention, the first is Apps:
Content Restrictions → Apps
Within Content & Privacy Restrictions, there is another section labeled Apps, as shown below:
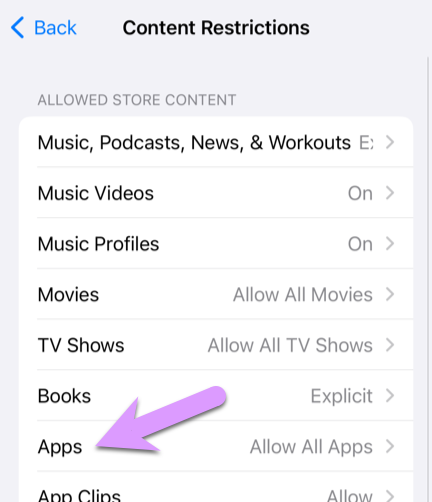
In my opinion, this area should be renamed as well. It's confusing because this is the third screen that seems to control access to apps, we've already seen Always Allowed apps, and Allowed Apps, and now here we have just Apps.
The purpose of this area is really to control what age rating of apps may be installed, which you can see from the drill-down screen:
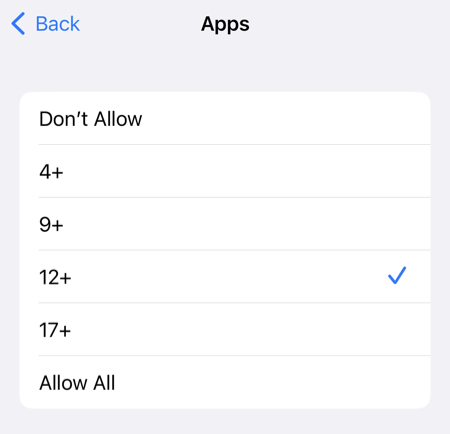
Set this to 12+ or even Allow All—your child can't install apps anyway, and you will be approving every app individually. Setting it too low can cause mysterious missing apps (see below).
Content Restrictions → Web
The second area that requires some more detailed explanation is the Web Content drill-down:
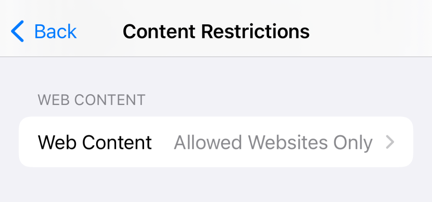
It is critical that you choose Allowed Websites Only for this section.
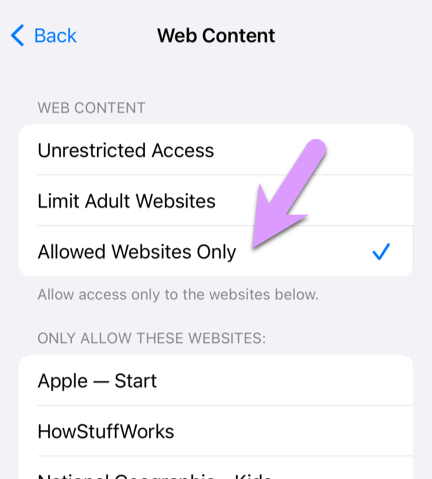
Even if you have taken our recommendation to entirely disable web-browsing by removing the Safari app, you still need to set this setting to Allowed Websites Only. That's because many apps have what amounts to a built-in web-browser, and reach out to the internet to load content when your child is using them. Without this setting chosen, otherwise safe apps can become alternative portals to the internet.
Content Restrictions → Siri
The third and final area that deserves special treatment is the Siri → Web Search Content:
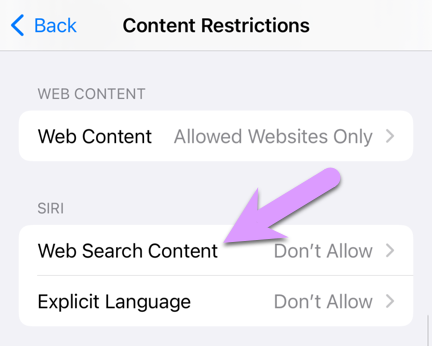
Make sure you've got this set to Don't Allow.
Testing it Out
Once you've got all your settings dialed in, you'll need to spend a few minutes testing. Exit out of the Settings app, and start kicking the tires. Check and make sure that no apps are available that you did not intend to make available. Double-check that Siri is not working. This would also be a good time to double-check all of your approved apps. Use the thought experiment I proposed above: spend a few minutes with each app, imagining you would immediately win $10,000 if you could find something inappropriate or dangerous. Imagine you are a bored, impulsive, motivated teenager with a lot of persistence and time on their hands.
Having the Right Mindset
I wish I could tell you that there's "one simple trick" or some silver-bullet technology to easily and perfectly protect your kids in this new world we live in. There's not. The reality is that it's going to take time, effort, and diligence to keep your kids safe online. It will be annoying, frustrating, and inconvenient at times, and will interrupt your day frequently. There will be a constant temptation to simplify your life by disabling protections and telling yourself that "my kid will be OK."
But don't despair, this really is possible. An enormously important step is just to settle it ahead of time that you're willing to put in the time and effort to actually keep them safe. Your kids might moan and groan, but they'll survive—and thank you one day. Stay the course, it's worth it.
Once you've got your kids iPhone locked down, I urge you to think carefully about their computer usage as well. If your kid has a Mac, you might want to check out Gertrude, the app I built to keep my own kids safe while doing school online.
Finally, if you'd like some encouragement if you're feeling overwhelmed, plus general techniques for working through this stuff with your kids while keeping your relationships healthy, check out this workshop I gave at a Christian Homeschool conference in 2024.