Getting Started
There are a handful of things you need to do to get up and running with Gertrude. This tutorial is meant to walk you through the required steps, and also to give you a bit of practice using all of the core features of Gertrude.
NOTE: If you'd prefer to watch a step-by-step video showing all aspects of getting started with Gertrude, click here.
Step 1: Set up your parent account
To start out, if you haven't already created a Gertrude account you'll need to do that first. To create an account click this link and follow the sign-up instructions. No credit card is required, the first 21 days are totally free, and you can cancel at any time.
Adding your first child
Once you have your Gertrude account created you'll need to start by adding at least one child. A "child" in Gertrude represents someone that you want to protect. This is very often one of your own children if you are a parent using Gertrude to protect your kids—but it could also be a peer whom you are protecting in a relationship of accountability. You'll need to add at least one child to do anything useful with Gertrude.
The most common scenario is for Gertrude to be used by parents protecting their kids. But that's definitely not the only way to use Gertrude. Peers, friends, relatives, etc., can all be protected, but for the sake of simplicity, we use the language of parent/child throughout the Gertrude app and websites.
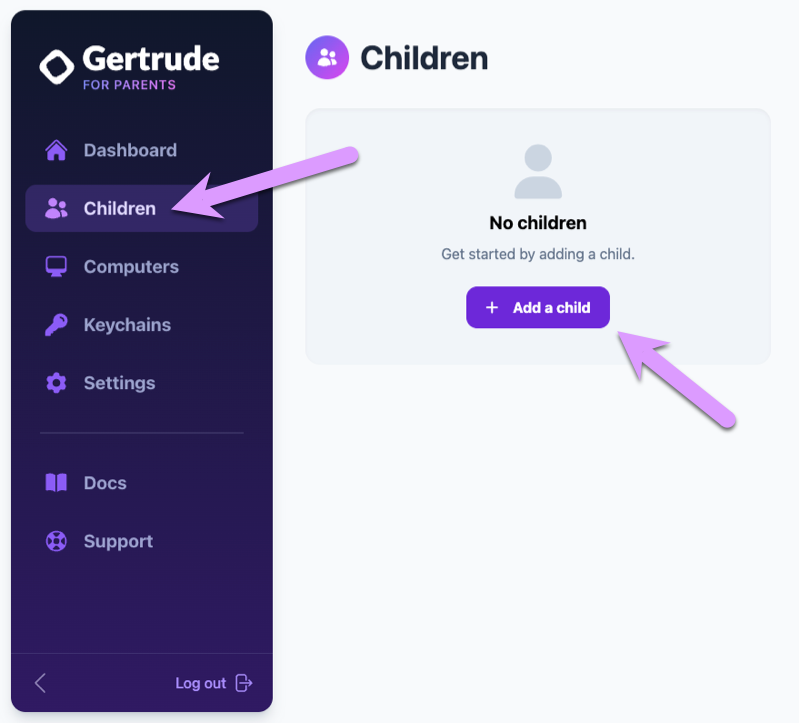
To add a child, click the link in the dashboard of the Gertrude parents website, or select "Children" from the side bar on the left hand and click the button to add a new child.
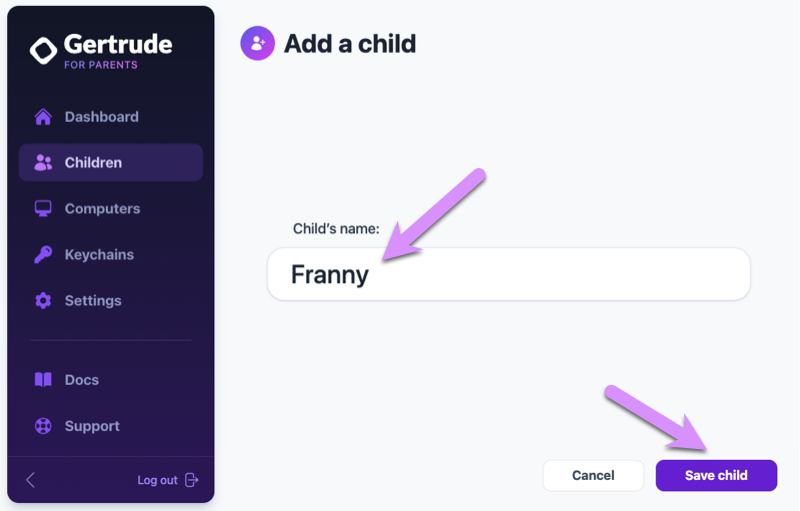
Enter the child's name, and click to save the new child.
Mac App Connection Code
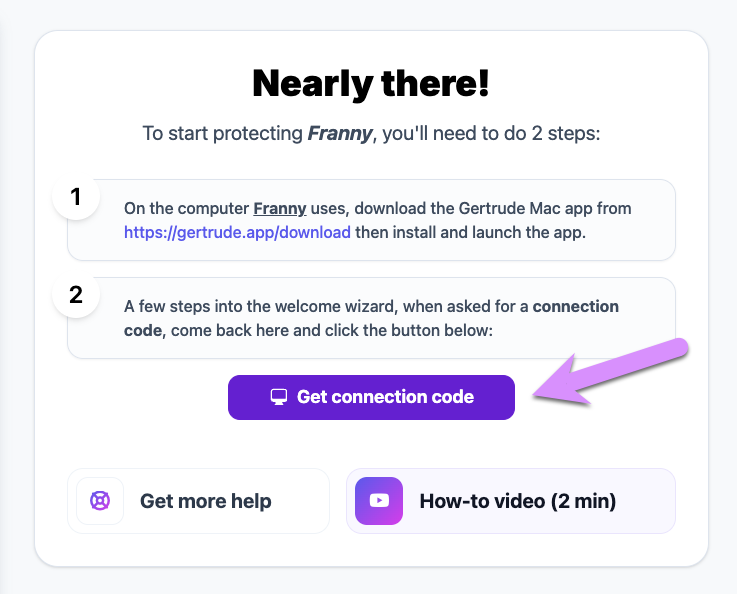
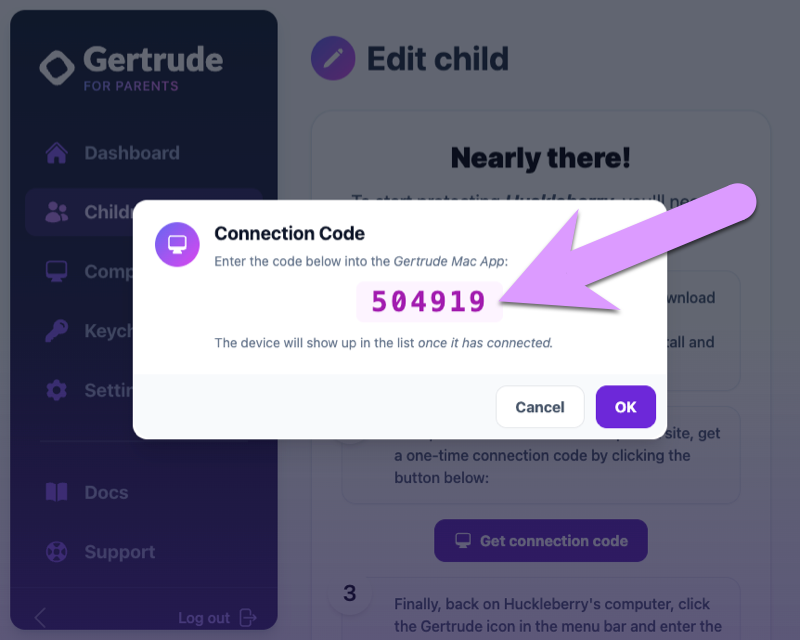
To finish setting up your first child, we'll need to install the Gertrude Mac app on their computer. But before we do that, you'll grab a one-time connection code to connect the app to the child you just added. To do so, click the Get connection code button on the next screen. You'll see a pop-up giving you a special one-time connection code. Write this code down somewhere; you'll be using it shortly.
Step 2: Connect a Computer
For the next part of the process you'll need to switch over to the computer that will be used by the child you're protecting. You might already be using that computer. But if you're a parent working through this tutorial on your own computer and your child uses a different computer you'll need that computer in front of you to do the next few steps of initial setup.
If you and your child share the same computer you might already be using that computer right now. If that's the case, you can either log into the parents site on your phone and finish this tutorial logged into this computer as your child; or finish the setup by switching back and forth between the Mac users on the shared computer. For safety, you will need to make sure you have separate macOS users—one for you, and one for your child.
Downloading & Install the Gertrude macOS App
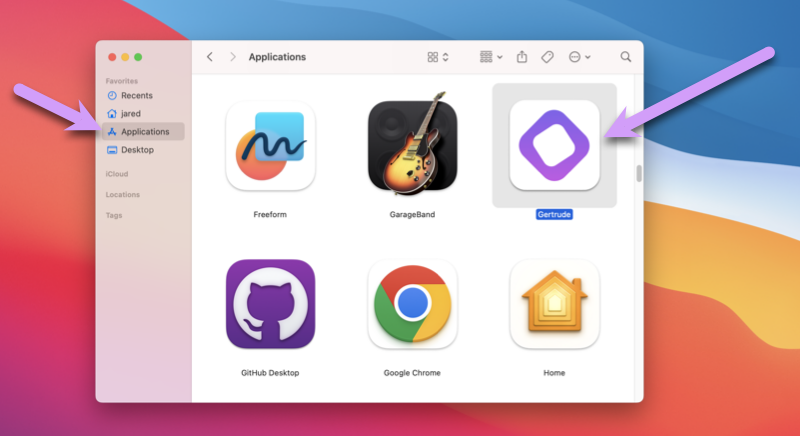
On the computer that will be protected, login to the macOS user that you desire to protect, then open a web browser, visit the Gertrude website download page (www.gertrude.app/download), and click the download link to get the most recent version of the Gertrude macOS app. Double-click on the downloaded file and then drag the Gertrude application into the applications folder.

Next, double-click on the Gertrude application icon in the applications folder to launch it for the first time.
After you launch the app for the first time, you'll see the Gertrude welcome wizard, which will guide you through all of the necessary steps to get the app fully installed with the correct permissions from the operating system.

After a few clicks, you'll see the spot where you should enter the connection code you got in step 1:

Because Gertrude needs to do things like:
- Filter the internet
- Send your child notifications when you unlock a site
- Record screenshots of their activity
- Record what they type
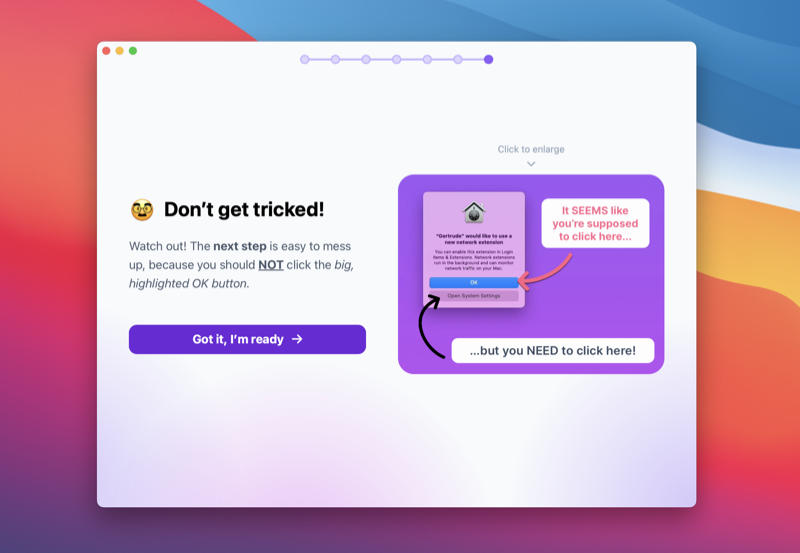
We have to request several special permissions during the welcome and setup process. The welcome wizard will guide you through all the required permissions, but a few of them Apple has made bizarrely unintuitive, so be on guard and carefully follow the instructions provided!
Once Gertrude is fully installed with the system extension running, it immediately starts doing its job of blocking ALL interent activity you haven't explicitly allowed. And since you're just getting started, you haven't allowed anything yet! That means your child's computer can't do anything at all on the internet, which can be a little bit of a short-term shock for parents, especially if your kids need to do work online right away.
Don't worry, you'll shortly learn how to unlock parts of the interent by adding public keychains and creating your own keys. But until then, if your child needs to use the computer for school right away put Gertrude on "easy mode" by giving lots of filter suspensions until you get the websites and apps they need unblocked.
If you haven't disabled screenshots, you'll be able to see their online activity, and it's much safer to have the filter suspended with screenshots than for you to get frustrated and stop using Gertrude. So use lots of filter suspensions to smooth your transition until you have everything dialed in.
Step 3: Setup Notifications
Now that you've got the app installed, two of the main things you'll likely want to do next involve you being able to get a notification from your child's computer. Specifically, we want you to get a notification when:
- your child requests to have the filter suspended
- or, your child requests to have a site unblocked
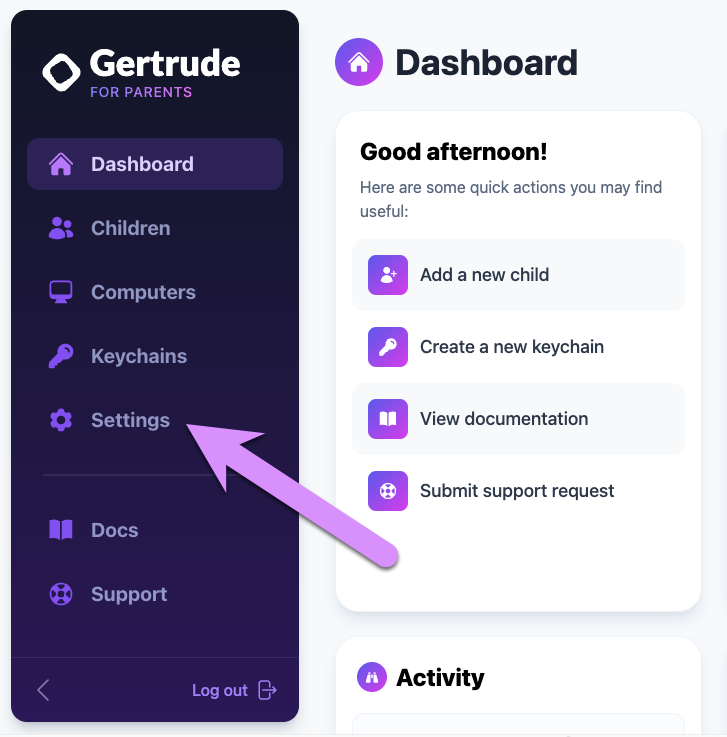
Head over to the Settings screen of the parents website:
You've already verified your email during the account creation process, so we can notify you by email if you'd like. But most parents prefer to get a text message, so we recommend you take a moment to verify your phone number as a notification method. Click Add a method to start the process.

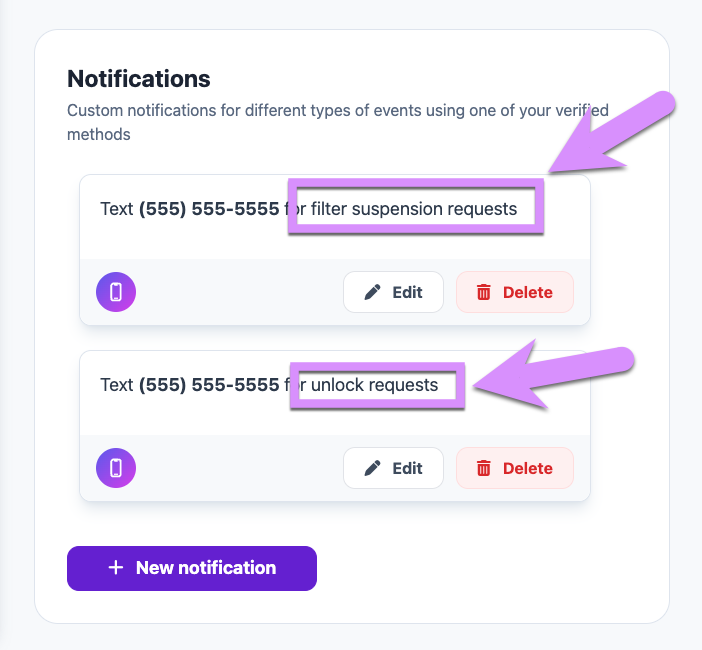
Once you have verified the method/s you'd like to use to be notified, set up a notification for BOTH unlock requests and filter suspensions:
Step 4: Practice Suspending the Filter
Now that you've got your notifications setup, let's take a quick minute to learn how filter suspension requests work.
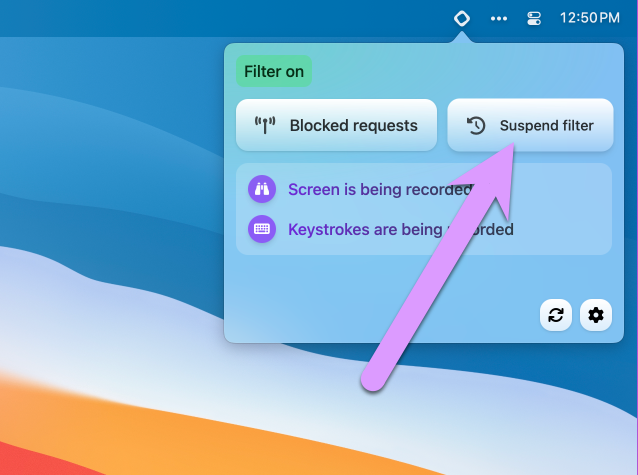
Back on your child's computer, click the Gertrude icon in the menu bar in the upper-left corner of the screen:
Then click the Suspend filter button, as shown here:
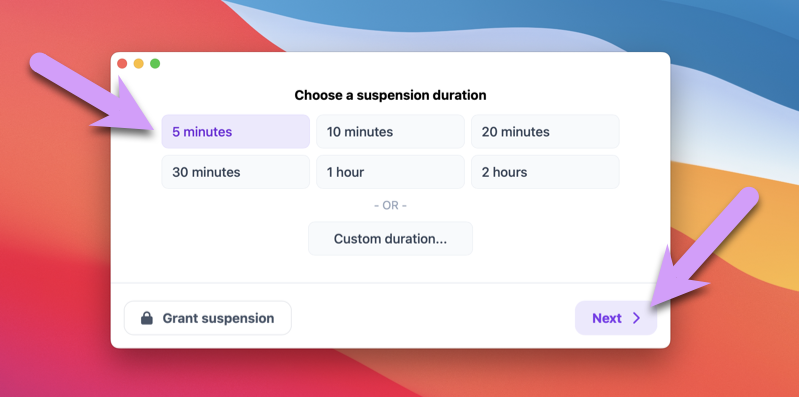
Choose a duration, and click next:
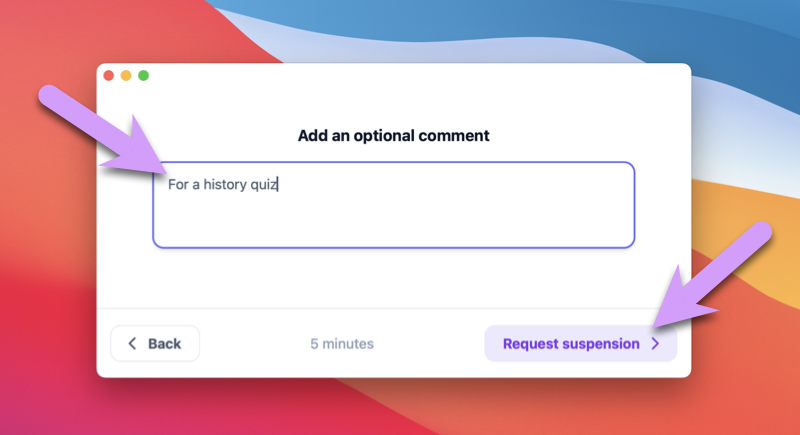
Try entering a comment, and then click Request suspension.
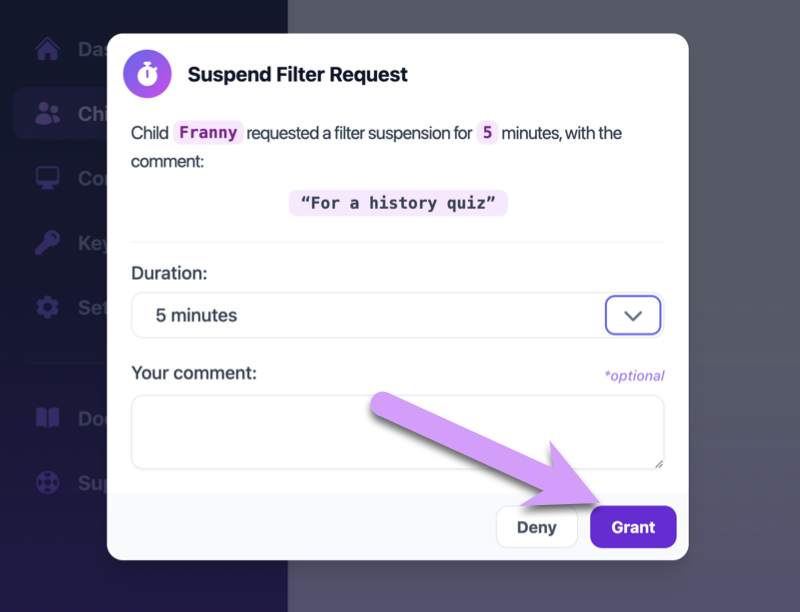
At this point you should receive a notification (if you completed step 3). When you get a text, email or Slack, you should see that your child has requested the filter be suspended, and their comment. Try granting the request.
Your child will receive a notification on their Mac that the suspension was granted, and clicking the Gertrude menu bar icon will show that the filter is temporarily suspended.
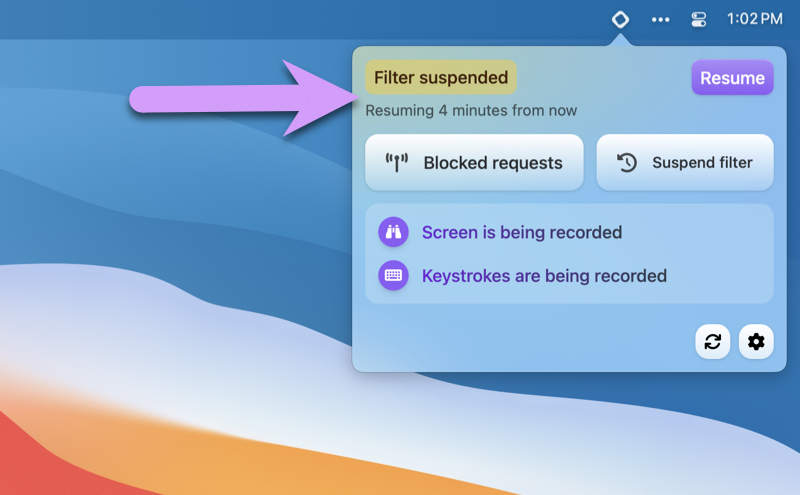
Congrats! You now know how to request and grant a suspension. As mentioned earlier, using filter suspensions is highly recommended while you're getting going with Gertrude, because it can take a little time to get all of the normal everyday parts of the internet unlocked for your kids. It's much better to suspend the filter for chunks of time than give up and uninstall Gertrude and lose all filtering and monitoring completely.
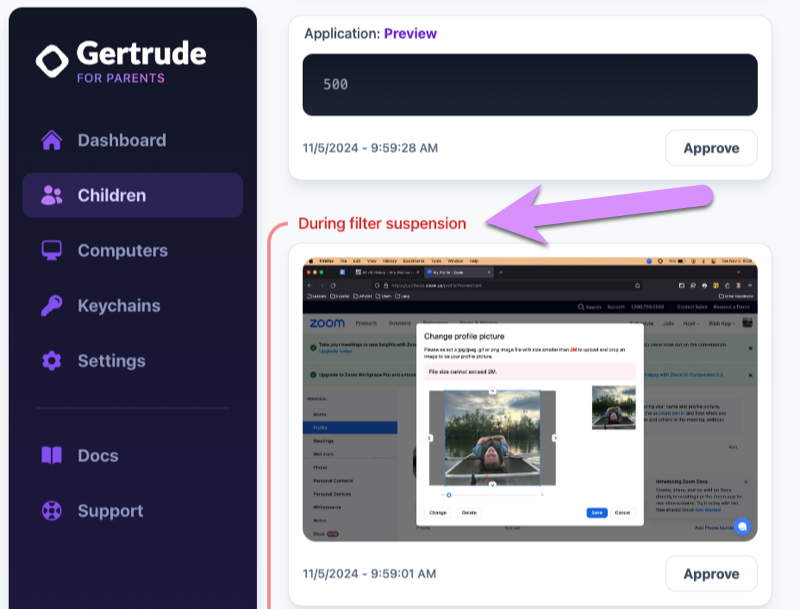
Speaking of which, Gertrude by default also indicates when screenshots are taken DURING a suspension which helps you hone in on particularly important stretches of activity to review.
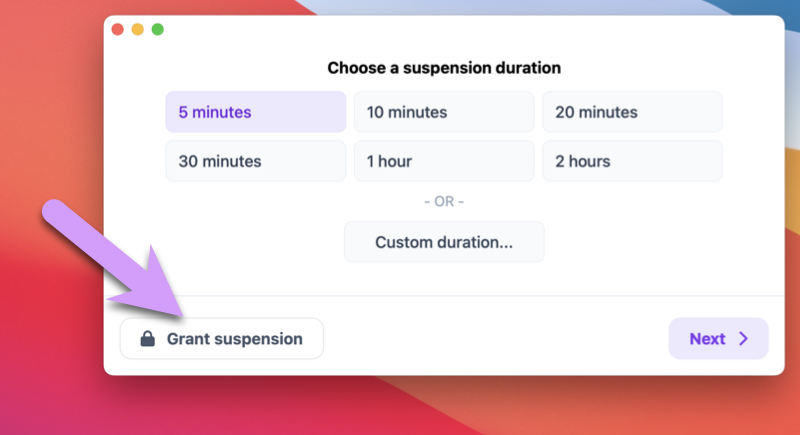
If you're physically with your child when they need a filter suspension, and you'd rather not reply to an email or text, you can always manually grant a filter suspension right from the computer, using an admin username and password by clicking the Grant suspension button.
Step 5: Add a Public Keychain
With Gertrude, the way you allow access to parts of the internet is with keys. Keys unlock parts of the internet. Gertrude's filter works by blocking the entire internet, only allowing access to the sites and apps you specifically designate as safe.
Most other internet safety app that filter the internet work by blocking categories of websites. This sounds like a great idea in theory, but in practice the internet is just too large and growing too fast for this to be truly safe. Tens of thousands of new websites are being created every day. No one can possibly keep a list up-to-date enough to make blocking categories actually safe in practice.
When you first install Gertrude, your child has zero keys by default, which means they can't access any of the internet. Super safe, but not terribly useful. Let's fix that.
Go to the Children tab of the parent's website, and click the Settings link for your child:
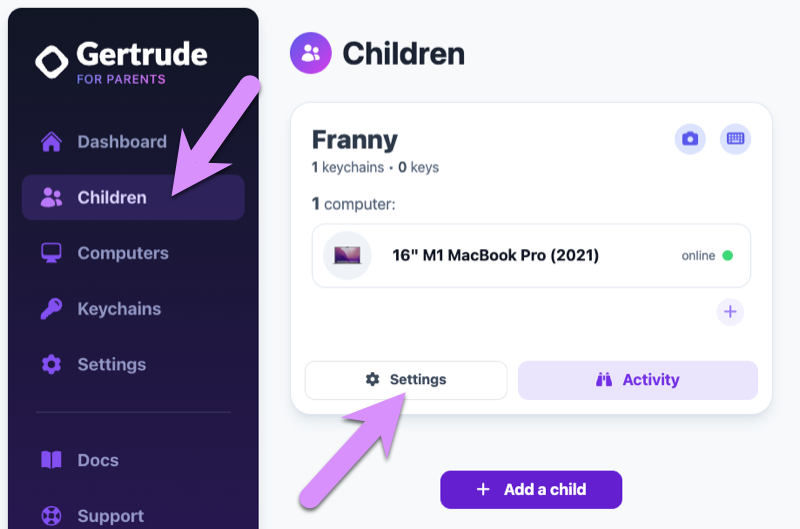
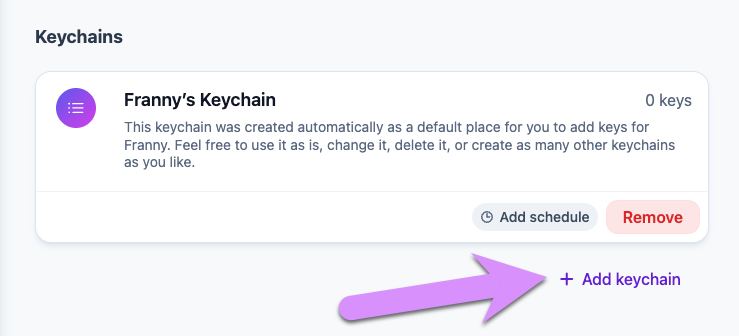
Near the bottom of the screen you should see a single keychain with zero keys. This keychain is created automatically for you when you create the child, as a default spot to hold keys for your child. Many parents use just one keychain to hold all of the keys their kids need, but others like to organize keys by topic (games, school, church), class, or anything else. Using more than one keychain allows you to share them between kids, and also take advantage of more advanced controls, like setting schedules for certain keychains. But for now, having one keychain we can add keys to is all we need.
Public Keychains
There are two types of keychains in Gertrude: 1) keychains that you own and can add keys to, and 2) keychains that we've created for all Gertrude parents to use—these are called public keychains. We maintain a growing list of public keychains to make it easier to quickly unlock common websites, apps, and online programs. Adding a few public keychains is a great way to get started unlocking some safe portions of the internet for your child. Let's add one to your child.
Scroll to the bottom of the screen and click Add keychain.
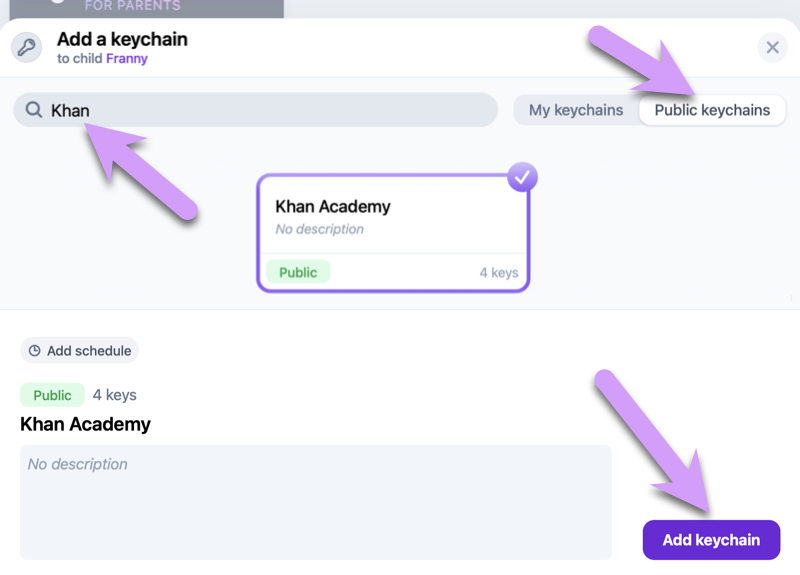
Click to view Public keychains, then try searching for Khan. Select the keychain, and click Add keychain.
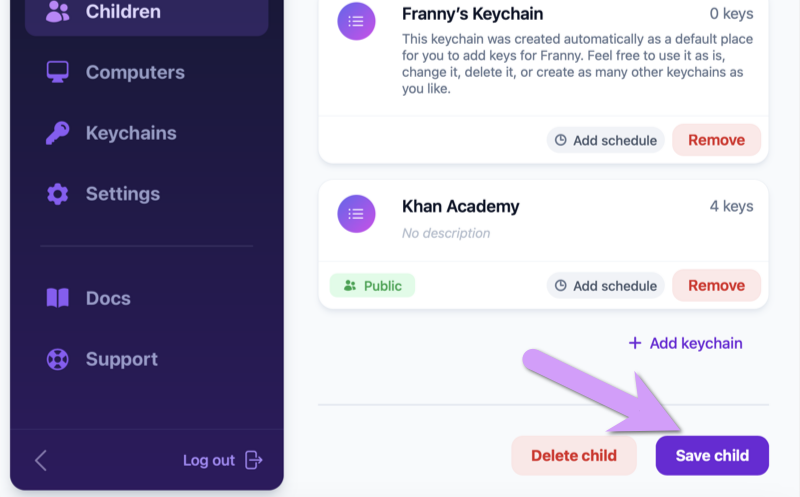
Once you've added the keychain, be sure to click Save child.
Once you've saved, test it out on your child's computer by going to https://khanacademy.org.

We're always looking to add more high-quality public keychains, so if your child is using a service, website, or school that you'd like to see a public keychain for, please reach out and let us know!
Step 6: Create A Key Manually
Ok, so you've added a public keychain that unlocks part of the internet. But we don't have public keychains for everything, you're going to need to know how to create your own keys. There's two basic ways to create keys, we'll cover both, starting with manually creating a key.
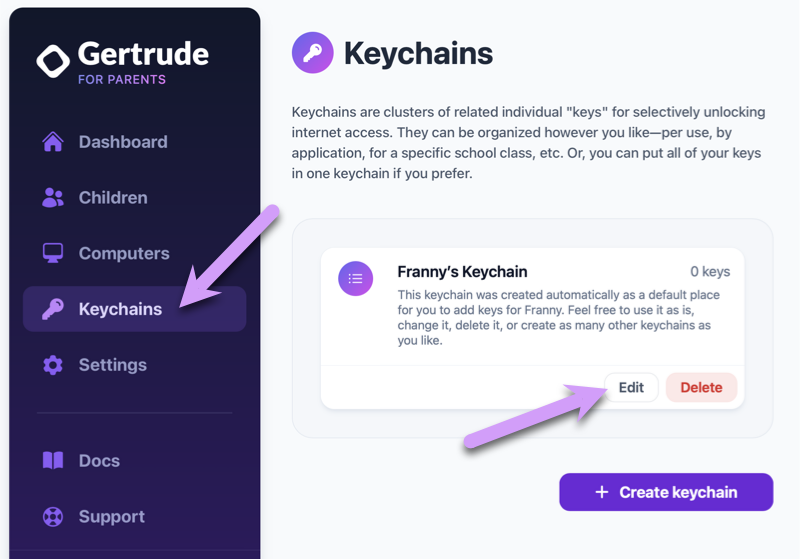
To create your own key, start by going to the Keychains screen, and click to edit the default keychain that was created for you.
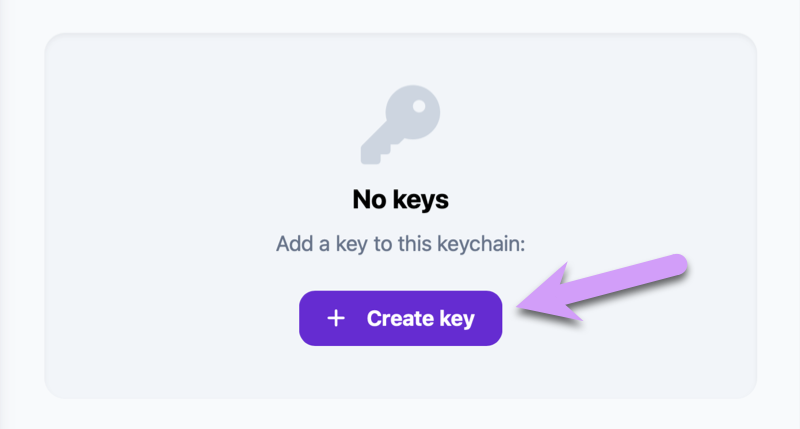
Creating and attaching your first key
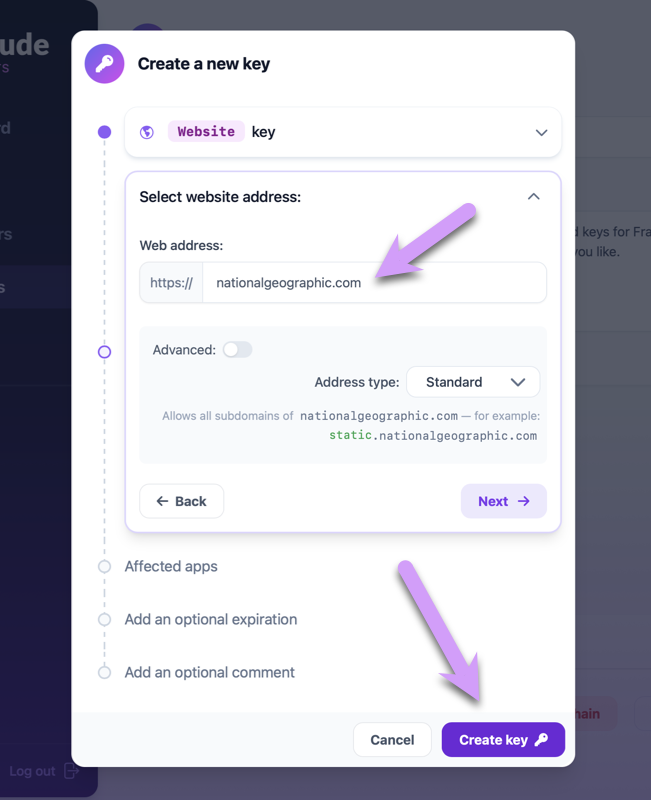
For the sake of this tutorial, start by creating a single website key. Enter the address of a website that you want your child to have access to, and leave the rest of the options unchanged. If you can't think of a website to unlock, enter nationalgeographic.com, as we'll use that example later in the tutorial. Click Create key to finish the process.
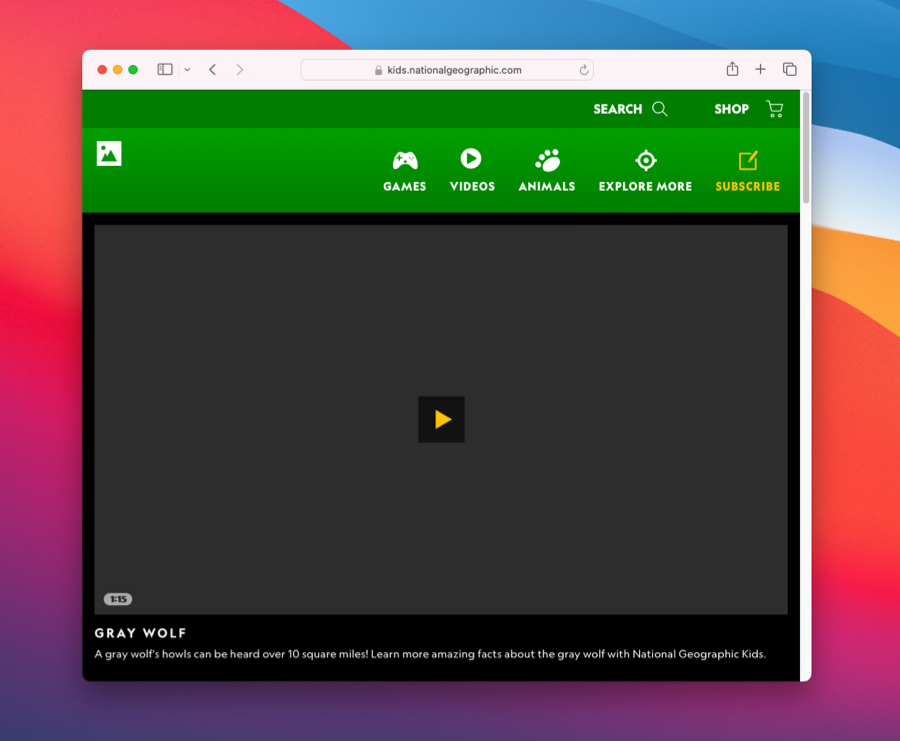
Next, back on your child's computer, try to visit kids.nationalgeographic.com. You may notice that it is only sort of loading.
Step 7: Create Keys by Sending Unlock Requests
The reason the website we tried to load didn't fully work correctly is that most websites ALSO load code from several OTHER websites, so it usually takes more than one key to get them fully working. This is one of the reasons we group keys into keychains. There's a more technical explanation here if you're interested.
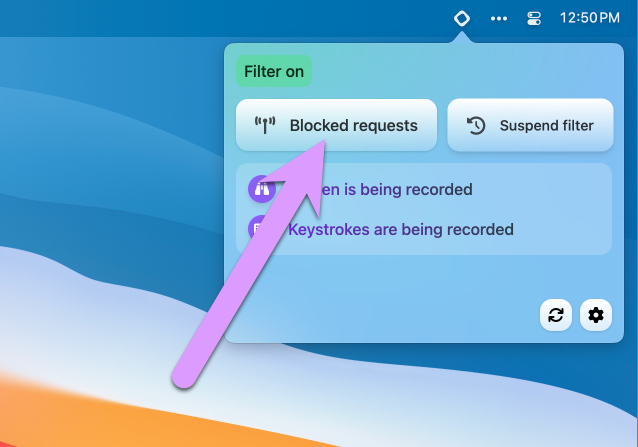
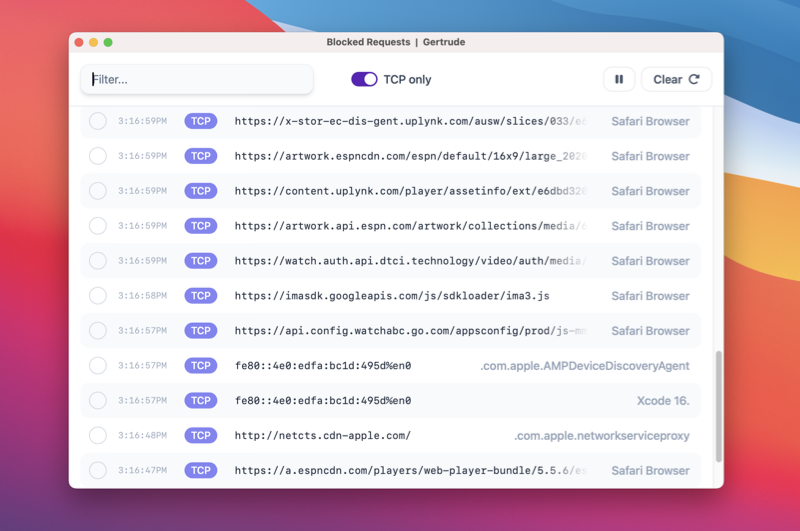
To fix this, we'll show you the more common way to create keys in Gertrude, using Unlock Requests, and in doing so we'll explore Gertrude's Blocked requests window. Go up to the menu bar icon again, and this time click Blocked requests.
When the Blocked Requests window appears, it will start showing you a list of every network connection being blocked by Gertrude. Your computer tries to make many network connections, so it's very common to see a lot of requests in this window, like this:
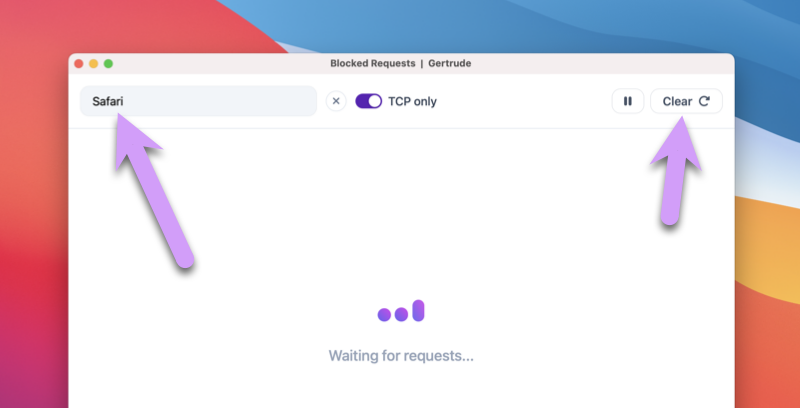
To make it easier to see the blocks we actually care about, type in a filter term to isolate requests just coming from the web browser Safari (or whatever browser you're using), and then press the Clear button to clear out old requests.
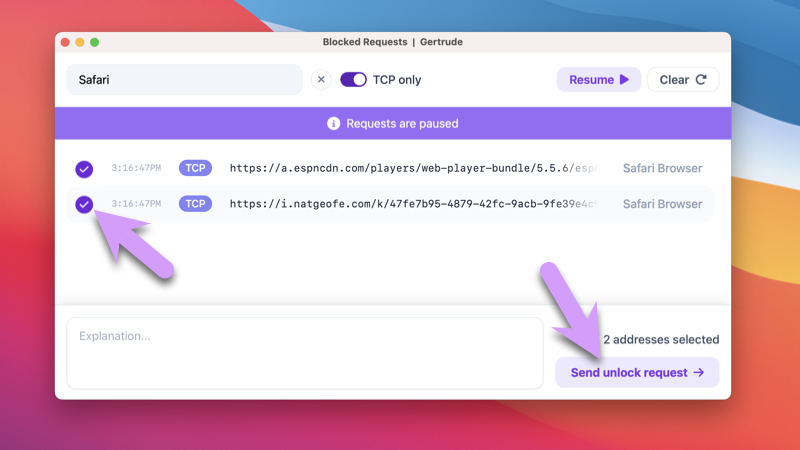
Next, RELOAD the broken website so we can see just the blocks we care about. They should come in at the same time we press refresh. Once they do, click the PAUSE button to prevent any new requests from streaming in:

Now we can select the blocked requests and send an unlock request.
Accepting an Unlock Request
Now that the unlock request is submitted, put back on your parent hat (you've been impersonating your child for the last few minutes), and visit the dashboard of the parents website. You'll notice that there is a new unlock request visible:
If you've setup notifications as recommended, you won't need to locate the unlock request in the dashboard. Instead you'll get a text, email or Slack with a link to immediately decide.
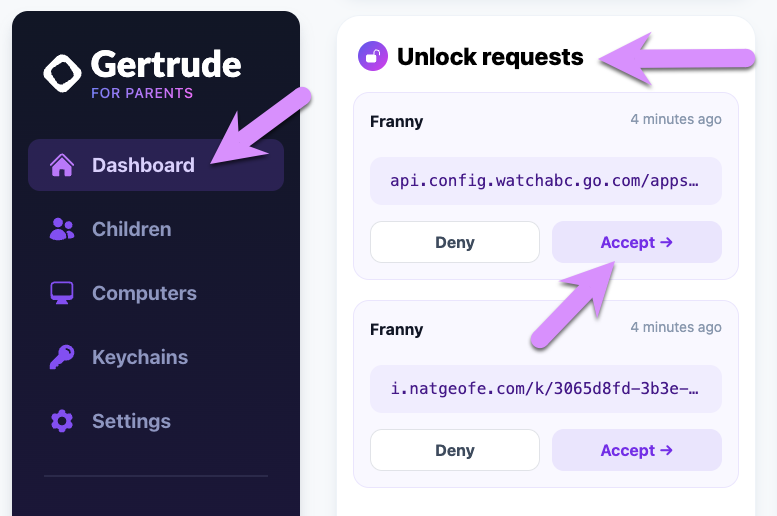
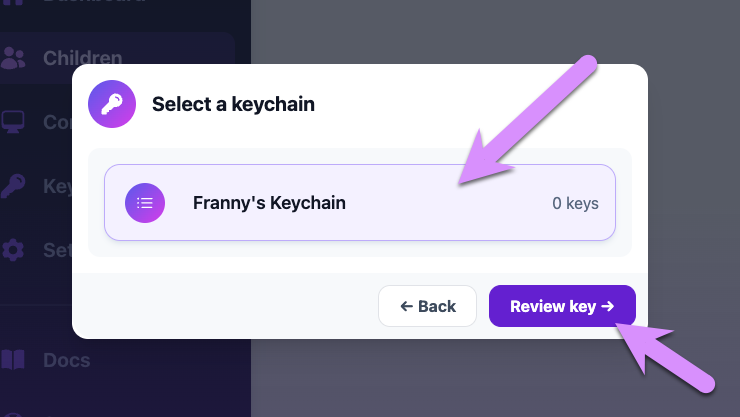
Click to accept the request, and you'll be taken to a screen where you get to choose which keychain to add it to. You likely only have one, so go aheand select it and then click Review key.
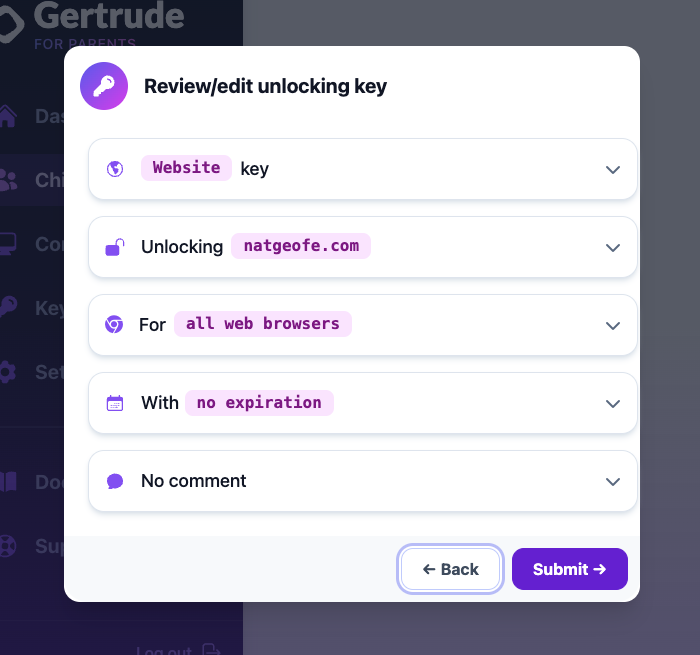
Next you'll be taken to a screen where Gertrude recommends a key that will unlock the blocked request. You're free to stop and edit the key if you want, but for now, just click to "Submit":
Back on the computer running the Gertrude macOS app, your child should see a notification that the unlock request was accepted. And if you refresh the web page, you should see that the site is now fully unblocked!

You should spend a few minutes with each of your children, showing them how to identify blocked requests and send unlock requests. In our experience, kids of all ages pick it up pretty fast. Once you're in a groove, your children will send you unlock requests when they need something, and you'll be notified via email, text, or Slack, and can approve or reject from your own computer or phone, no matter where you are.
Step 8: Practice Reviewing Child Activity
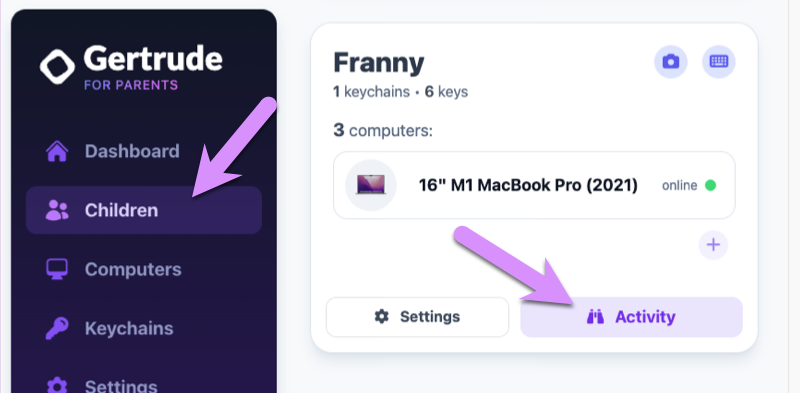
If you haven't disabled monitoring of your child, you will be able to review your child's activity right from within the Gertrude parents website. In fact, if you've been following along with this tutorial you should already have a few items that you can review. To see how this works, login to the Gertrude parents website and go to the children screen and select the activity link from the child you added.
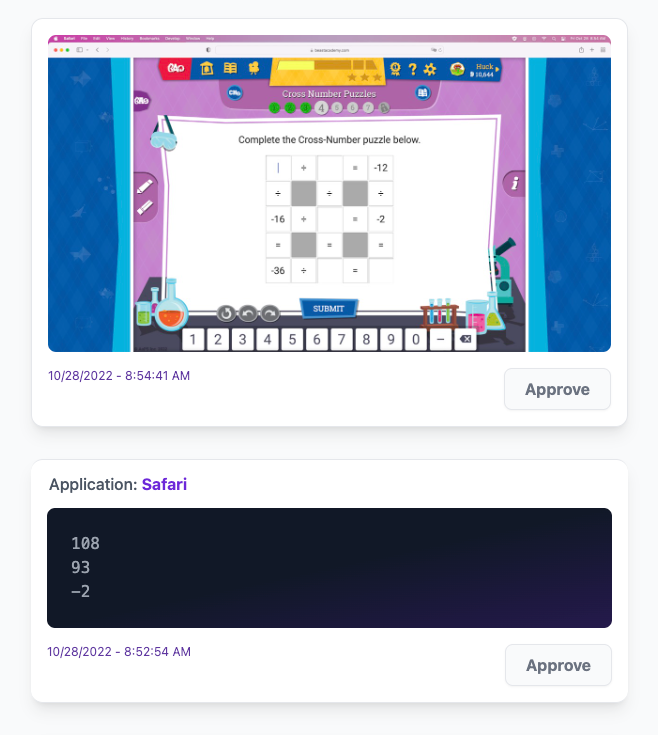
You should see on the next screen that there are some unreviewed activity items. Click to view these and you will see a mixture of screenshots and text that was typed by the child.

Approving an item is essentially the same thing as deleting it. The idea is that an "approved" item does not need to be seen again. It's rare that you'll actually approve items individually—you'll notice when you have large amounts of items to review, that Gertrude gives you the option to approve them in chunks of one hundred at a time, and also you can approve an entire day at once at the bottom of the screen.
It's not absolutely necessary that you always meticulously review each and every activity item. But we strongly recommend that you at least review some of them so that you can periodically make comments to your kids about what you've seen and read while reviewing. The knowledge that they are being watched is one of the key components of what makes your children safe.
Step 9: Explore More...
You've got all the basics now, but there are more features you might want to check out, including:
- Creating a Downtime schedule for your child when they get zero internet access (usually at night)
- Assigning keychains to be active for certain times of day or days of the week
- A feed of Security events that you can review to get a birds-eye view of your events to keep an eye on for you children's safety
- Our companion iOS app which plugs holes in Apple's Screen Time
- The internet's best step-by-step guide to locking down an iPhone for a child.
If you have any questions, feature requests, or need help with anything, please don't hesitate to contact us. We'd love to hear from you!
The Gertrude mac app helps you protect your kids online with strict internet filtering that you can manage from your own computer or phone, plus remote monitoring of screenshots and keylogging. $10/mo, with a 21 day free trial.